Author: James Baltar (Page 1 of 3)

Django & Webpack

Table Of Contents

  1. Overview
  2. Environment Setup & Requirements
  3. Setup Webpack
  4. First Webpack Packaged Assets

Overview

I’ll assume that you already know Django and is already well versed with it and you just want to integrate Webpack into your project. If you already know what is Webpack and how it works please proceed to Environment Setup & Requirements. For those of you that is not quite sure what Webpack will bring into your Django project then please read on for brief introductory of it. Continue reading

Dovecot Email Migration

So I’ve just migrated my mail server recently. I was initially using iRedMail but needed to move it to another server. The problem though is that the destination server already had MySQL and Nginx as a web server. I just wasn’t comfortable running a script that has a chance to break what I’ve currently setup. I also didn’t want to take the route of creating my own email server from cratch. I’ve already did it in the past and it was okay but it was a hassle to maintain. So like anyone else I’ve jumped to Google to search for any free open source email server. Lucky for me I was able to find Mailcow relatively quickly. It’s open source and uses popular open source software for the email server components (MTA, Database, WebServer, etc.). The great thing about it though is that its dockerized which would not interfere with what is currently installed in the destination server. Continue reading

Launch Your Android App Using Your Website URL

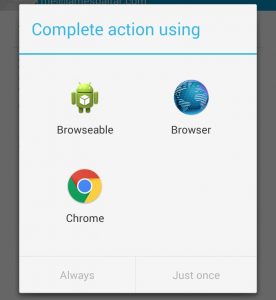
You have a website and an android application and you want it so that an android user will be redirected to the application once they open a link from their email. Good thing android have an easy way to do this using Intents and Intent filters.

The first step is to add an information in your applications AndroidManifest.xml to tell the system that you want to received an intent regarding opened links. Open your AndroidManifest and add the following under the activity that you want to receive the intent.

<activity
 android:name=".MainActivity">
 <intent-filter>
 <action android:name="android.intent.action.MAIN" />
 <category android:name="android.intent.category.LAUNCHER" />
 </intent-filter>
 <intent-filter>
 <action android:name="android.intent.action.VIEW" />
 <category android:name="android.intent.category.DEFAULT" />
 <category android:name="android.intent.category.BROWSABLE" />
 <data android:scheme="http" android:host="www.jamesbaltar.com"/>
 </intent-filter>
</activity>

What this does is tell android that your activity can handle and process links that was opened by users. Now everytime a user opens a link to www.jamesbaltar.com a popup window will appear showing a list of applications that can process the link this includes browsers installed, your application and some application that have also registered for this.

Continue reading

Create A Python 3 Environment With virtualenv

Update: If you’re already using Python >=3.3 then there’s is already a package called venv which you can use to create you’re virtual environment with just:

python3 -m venv myennv

virtualenv is very useful in developing Python because you can create your project’s own environment without polluting the or messing with the global or your other projects Python environment.

First make sure that you have already installed virtualenv and pip for Python 3.

$ sudo apt-get install python3-pip 
$ sudo pip3 install virtualenv

Continue reading

Setting Up A Linux, Nginx, MySQL & PHP (LEMP) Stack On Debian 7

This will be a tutorial for setting up your own LEMP stack on Debian 7 Wheezy. This might be also used for installing one on Ubuntu but is not guaranteed.

LEMP Stack?

LEMP is almost the same with a LAMP stack but the Web server part is replaced with Nginx. LEMP is an acronym for a software bundle of Linux, Nginx(for E), MySQL and PHP. Sometimes any of this softwares gets replaced like MySQL can sometimes be replaced with MariaDB and PHP either Perl or Python. Continue reading

Setting Up A Linux, Apache, MySQL & PHP (LAMP) Stack On Debian 7

This will be a tutorial for setting up your own LAMP stack on Debian 7 Wheezy but this might also work for Ubuntu but is not guaranted.

What Is LAMP?

LAMP is an acronym for a software bundle that is Linux, Apache, MySQL & PHP. There are already available installer for this software stack like XAMPP which can be easily installed but if you want to setup your own LAMP stack using Debian aptitude then please read on. Continue reading

MySQL Procedure To Upper Case Table Names

Ever had an experience where you needed to rename a handful of table name into upper case. Below is a procedure to rename all tables into upper case in the current MySQL database/schema.

DELIMITER $$
 
DROP PROCEDURE IF EXISTS `PROC_TABLE_NAME_TO_UPPER_CASE`$$
 
CREATE PROCEDURE `PROC_TABLE_NAME_TO_UPPER_CASE`()
BEGIN
 DECLARE tbname TEXT DEFAULT ;
 DECLARE no_res INT DEFAULT 0;
 DECLARE cur CURSOR FOR
 SELECT t.table_name
 FROM information_schema.tables t
 WHERE t.table_schema = DATABASE() AND t.table_type=BASE TABLE;
 DECLARE CONTINUE HANDLER FOR NOT FOUND SET no_res = 1;
 
 OPEN cur;
 
 rnloop: LOOP
 FETCH cur INTO tbname;
 
 IF no_res = 1 THEN
 LEAVE rnloop;
 END IF;
 
 SET @s = CONCAT(RENAME TABLE `, tbname , ` TO ` , UPPER(tbname), ` );
 PREPARE stmt FROM @s;
 EXECUTE stmt;
 END LOOP;
 
 CLOSE cur;
 
END$$
 
DELIMITER ;

Just run the script and call it using

CALL PROC_TABLE_NAME_TO_UPPER_CASE();

then it will rename the tables. Be reminded though that you need to specify the database to be used before connecting to MySQL or by using the use command.

Read String Console Input Including Spaces Safely In C

Reading a string input with spaces in between words can be tricky. There are two functions you can use here its scanf() and fgets(). Both can be used to read in strings from console safely. By safe I mean not overflowing your buffer.

Using fgets()

This is the common way of retrieving input including spaces safely.

#include 
 
int main( int argc, char* argv[] ) {
 char buffer[1024];
 
 printf( "Please enter a string: " );
 fgets( buffer, 1024, stdin );
 printf( "You entered: %s", buffer );
 return 0;
}

Using scanf()

This is the one I prefer to use over fgets(). Continue reading

CodeIgniter: Remove index.php From URL With The Project Mounted On A URL

If your CodeIgniter project is mounted on URL that looks like

http://www.example.com/codeigniter-project/

and you want to remove the index.php so that your URL to a some page example a blog page will look like this

http://www.example.com/codeigniter-project/blog/view/1

instead of

http://www.example.com/codeigniter-project/index.php/blog/view/1

Then first you need to make sure that mod_rewrite is enabled in your apache by typing this in the terminal:

sudo a2enmod rewrite
sudo service apache2 restart

Then in your CodeIgniter installation folder add an .htaccess containing this:

 RewriteEngine on
 RewriteCond $1 !^(index\.php|resources|robots\.txt)
 RewriteCond %{REQUEST_FILENAME} !-f
 RewriteCond %{REQUEST_FILENAME} !-d
 RewriteRule ^(.*)$ index.php/$1 [L,QSA]

The last thing you need to do is make sure that in your config.php index_page is blank:

 $config[index_page] = ;

Unblock IP From fail2ban SSH

Okay, Ive done this sometimes where I typed in my password hastily and ended entering it incorrectly mutiple times which results to my IP being ban by fail2ban. To unban your IP you need to either wait for the ban time you set to expire or if you cant you will need to access your server using a different IP address.

Once you have gained access to your server type this in:

iptables -L -n

Search for the line where you IP is. It should be below the line of:

Chain fail2ban-ssh (1 references)

If its there then your IP is still banned from using SSH. To remove it type:

iptables -D fail2ban-SSH -s [your-ip] -j DROP

Change “[your-ip]” to your actual IP. Now check again the iptables and the entry for your IP is should now be gone and this means that you are now unban from fail2ban-ssh.

« Older posts

© 2024 James Baltar

Theme by Anders NorenUp ↑